Showing posts with label Visual Motor Skills. Show all posts

Sunday, April 5, 2015

Pre-writing is FUN! Week #6

Happy Easter and welcome back after a few weeks off from working in the Apple Room due to in-services and illnesses, ugh!

This week, true to habit, the kids were seated in a circle and ready for "pass the putty!" Check out a previous post here where I talk about the benefits of theraputty and the activity that we have performed since week 1 of Pre-writing is FUN! After we chatted about weekend plans, we briefly spoke about proper pencil grip. The Apple Kids then told me whether they had a starting corner or middle starter letter to start their name, and most of them were right on! The Handwriting Without Tears® program uses a blue mat, chalkboard, stamp pad or shaded gray squares on paper to help kids understand where and how to build and draw their letters and numbers. This ensures good formational habits from the start and gets kids using uniform vocabulary too! A lot of what we have focused on in the Apple Room thus far is pre-writing activities, and these are great tools to use at home with your pre-schoolers! Please note that the following 3 images are from the hwtears.com website.

The kids then engaged in a warm-up worksheet getting them ready to draw the first letter in their name. The worksheets used are from the Get Set For School™program and My First School Book. For example, for the letter R, the page focuses on a diagonal line encouraging the children to work left to right and getting them ready for the diagonal on the R, the S pre-sheet has faded lines doing a little c and then a backwards c working to the next page to draw an S, you get the picture ;)

After the kids wrote the first letter in their name, we handed out name strips to write their whole name. Now, this is where the confusion began and this has been a topic of discussion between myself and the teachers since the start of our Pre-writing if FUN! program. When left to their own devices, the kids make formational errors, are not sure whether to write in upper or lower case and just try to make their name look like they've seen it, but they are really not sure how to go about writing the letters. For many, they have the first letter down pat because we have practiced this multiple times, but the rest of their names - challenging. I will give you my opinion on this, and what I have done with kids for over 10 years.

  • Developmentally, learning upper case letters first is appropriate for children. They need to make big lines, littles lines, big curves and little curves - it's not too tricky! They will more easily learn a top to bottom approach learning upper case letters first and will begin writing with good habits from the get go! 
  • When ready, it is important to begin teaching kids how to write their name case sensitive. Ideally, this will begin towards the end of their last pre-school year, for us, Apple Kids! However, some children truly may not be ready for this transition, and I think it is important to honor these children too. 
  • In transitioning to case sensitive name writing i.e. Henry vs. HENRY, it is also important to teach the children how to write their names - this is a skill that needs to be taught and with common cores changing, it seems that we get further and further away from teaching handwriting (this is especially true in the higher grades with teaching cursive writing). Again, incorporating multi-sensory approaches with drawing names in rice/sand, building with roll-a-dough, using the slate chalkboard, will help build good formational habits even with more challenging lower case letters.
  • Teaching upper case letters first is developmentally appropriate and children will be able to make the transition to writing their name case sensitive. From a motor memory perspective, the children can transition because they have learned how to make the letters properly, using multi-sensory approaches, at the right developmental stages.
I cannot say enough about The Handwriting Without Tears® program to help children learn so many skills necessary for learning handwriting in school. All of my previous posts have explained the many areas that we have focused on, so I will not go into it here. To end, follow this link to view a quick video of the kids singing a song from The Get Set For School™CD. It is a song that teaches kids to use a top to bottom approach for writing - Where do you Start your Letters?  Enjoy!


Wednesday, March 11, 2015

Pre-writing is FUN! Week #5

Hello Everyone and welcome back to week #5 of Pre-writing is FUN! I apologize for the delay on this post, but I have been under the weather since last Friday. This past week in the Apple Room, we started with our routine pass the putty activity talking about our weekends! A lot of skiing, snowboarding and sledding with hot chocolate going on! We then moved into some calming, self-regulating yoga poses and engaged in some deep breathing as well. Next, I explained all of the stations to the kids, split them up and they began on their fine motor adventure!


The first station was building Mat Man™ . The Apple kids are amazing with Mat Man™ now, and for the most part, are independent in building him appropriately! This group was having fun making him into a monster with a million eyes after they had built him correctly. A lot of the kids still need help with where to place his arms, as noted to the left. However, they quickly move the big lines when I ask them if their arms come out of their waist or shoulders?! In cleaning up Mat Man™ I heard the students putting the lines and curves together using the vocabulary from HWT®, which is awesome (big lines, little lines, big curves, little curves)!
The next station was pulling beads out of putty. (I've described the benefits of putty in previous posts and also a link to buy it on Amazon, so check those out!)
To the right, the children are working hard to squeeze and pinch the putty using their tactile sense to find the beads. Then, they have to use their "pinchers" and intrinsic hand muscles to pull the beads out! The kids then had fun making their putty into pancakes, as shown below, and then placing the beads back in for their friends.


Zoo sticks are the best! They promote children to use their "pinchers", open up their web space, which is the space between the thumb and pointer finger that should make a circle during writing, and strengthen intrinsic hand muscles required for pre-writing and writing. In the picture to the right, Henry is using the zoo sticks to place beads in the flowers center, and his partner is counting how many he has done so far, incorporating some early math skills into this station. It is important to note that if you do get these for home, please ensure the children are using them correctly. Using their whole hand or all of their fingers does not strengthen the same muscles as when just using their "pinchers" mimicking a tripod pencil grasp. I also let children add their middle finger for added support, if needed, mimicking a functional quadripod pencil grasp. You can also place a small bead in the palm of the child's hand that the ring finger and pinky need to hold, separating the two sides of the hand and again, focus on improving the strength and coordination needed during pre-writing and writing tasks!


Legos, Legos, Legos! Need I say more? Kids love Legos and the Apple kids were so creative in their designs! Legos work on sharing, socialization and working together all while improving fine motor and visual motor skills!

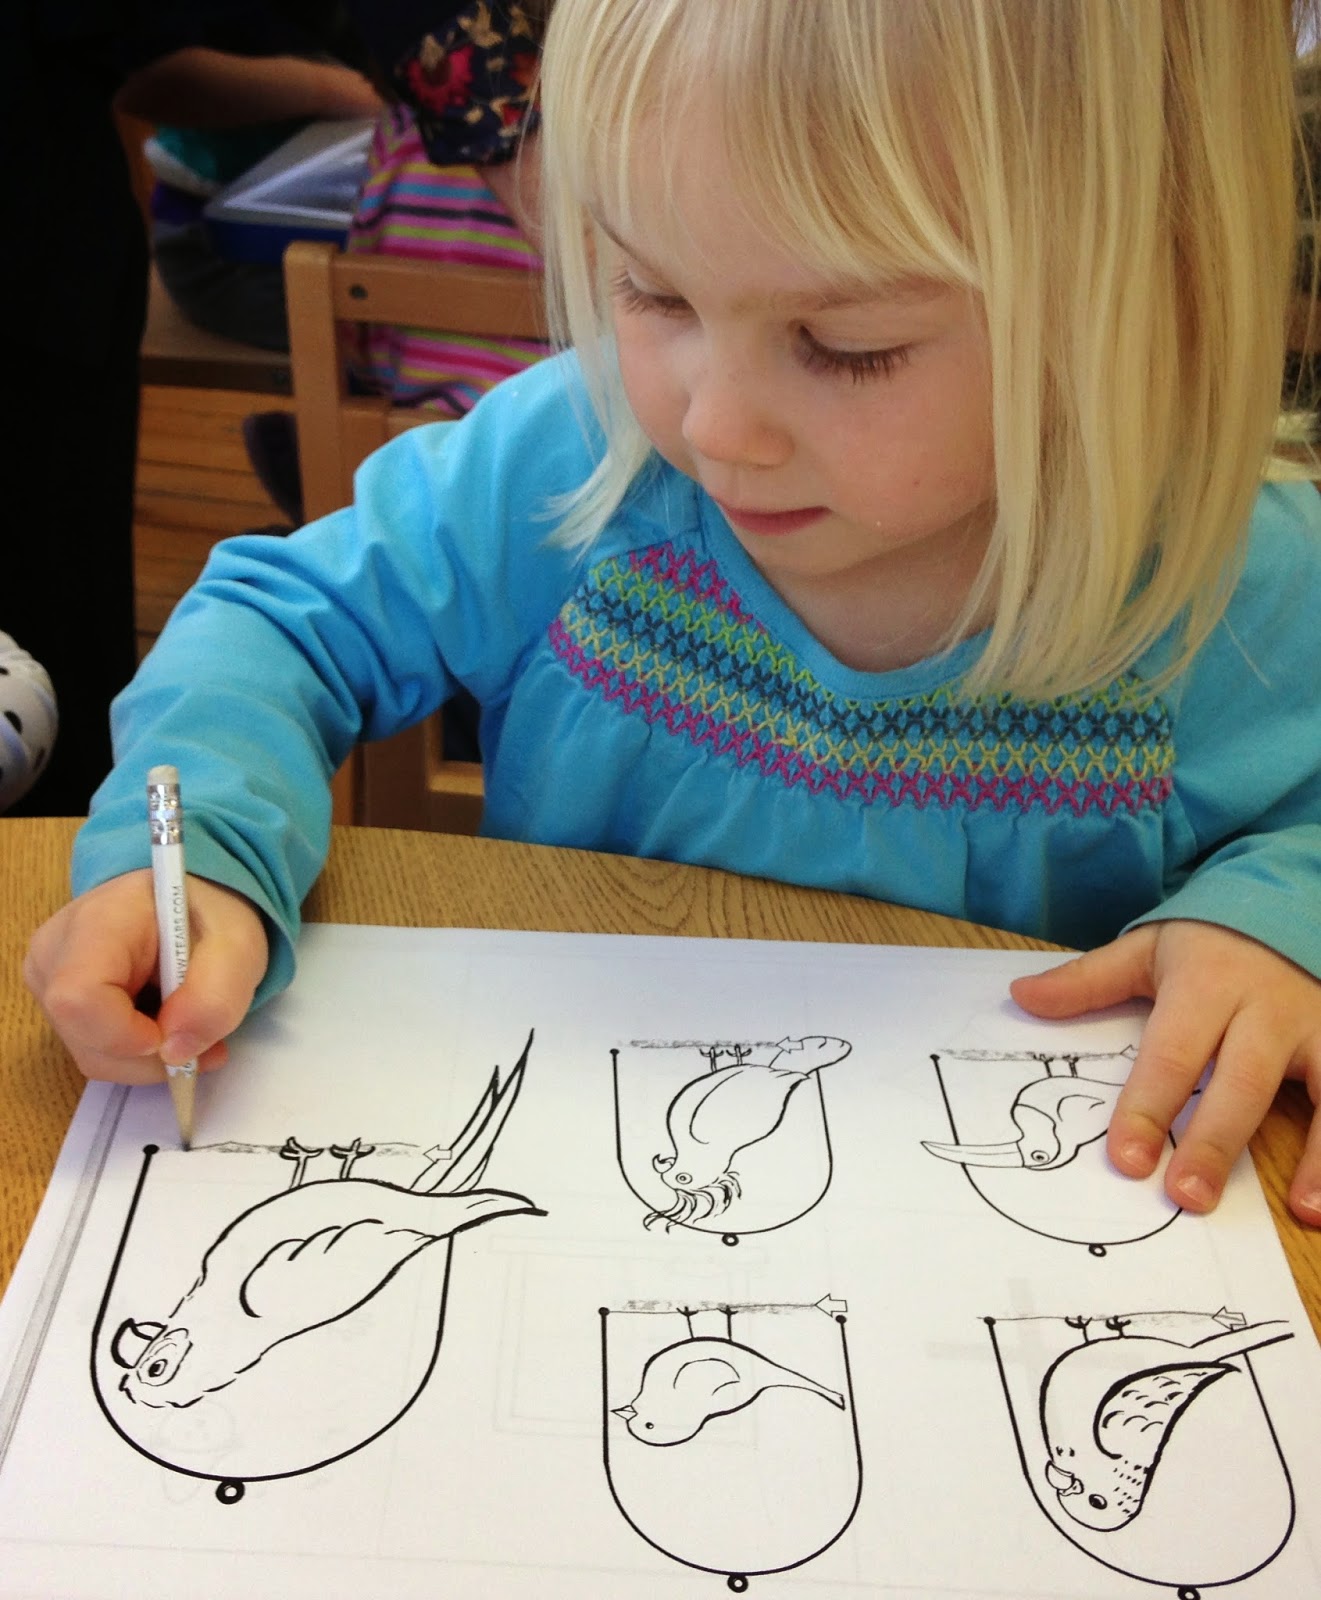
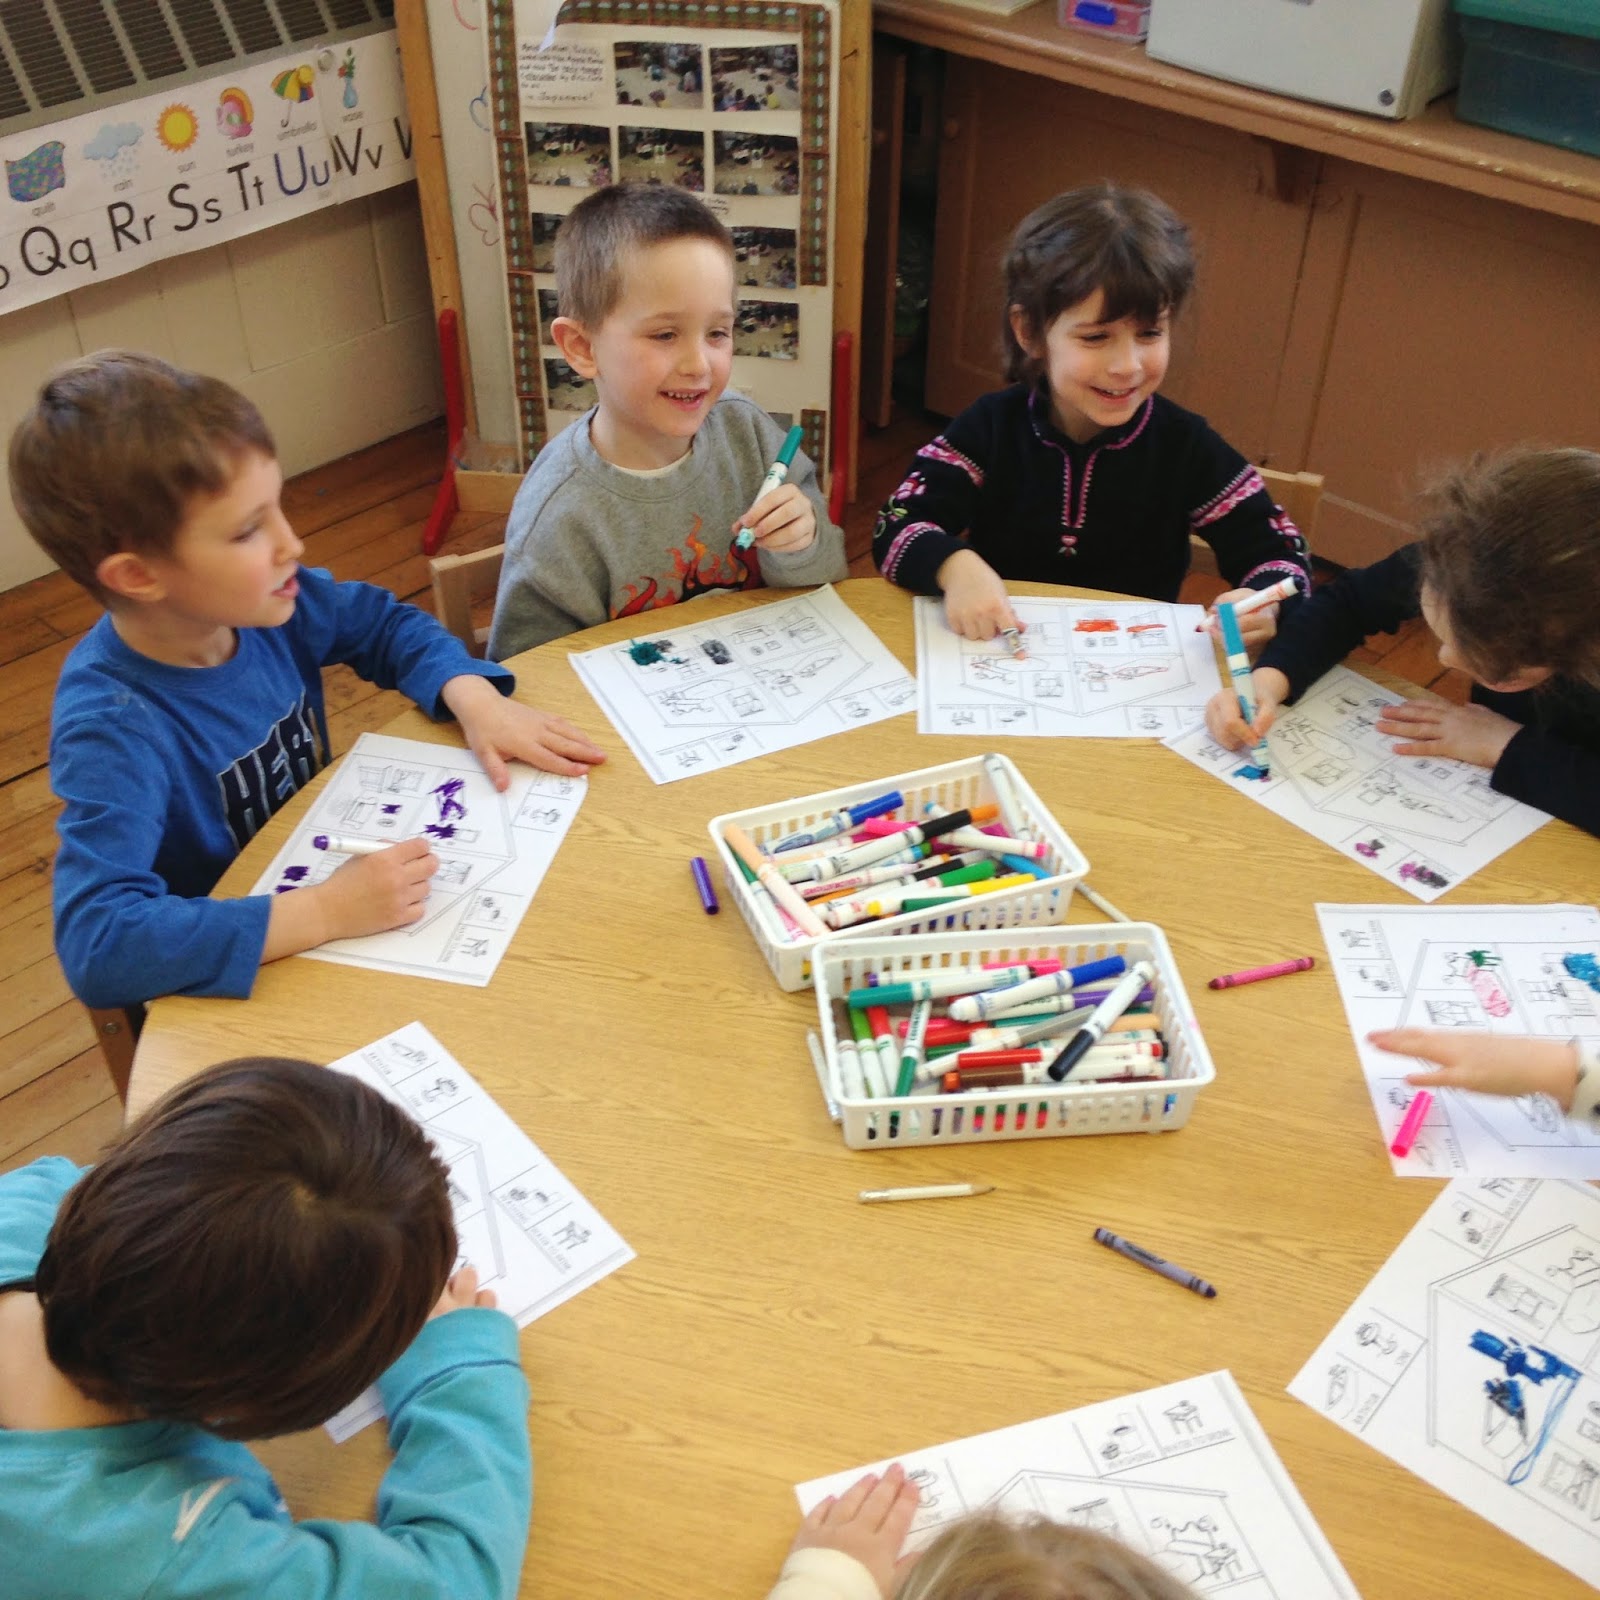
Now, that everyone's hands were warmed up, it was time for some pre-writing! The worksheets that we completed were out of the Get Set For School™workbook from HWT. To the right, Josie Kai is using a beautiful tripod grasp on her pencil and helping to draw lines at the bottom of the birdcage in a left to right manner. The kids had so much fun doing these worksheets, and the photos below speak for themselves! The 4 activities that the students completed, which went home with them last Friday, worked on drawing lines in a left to right and top to bottom manner. *Please note, we have a few lefties in the class. Left handed students can make lines from right to left, such as in crossing a T, t. However, when making circles, please encourage a counter-clockwise direction, as this is helpful in building good habits needed to form some of their letters (c, a, o, g, d). One worksheet also had kids find certain items in a picture of a house, working on visual discrimination and figure ground abilities. The kids then had to color in the items increasing distal motor control (small refined movements of the hands). All of these pre-writing skills are fun and so important for kids to learn before diving into writing. These foundational skills improve children's fine motor and visual motor abilities, increase spatial awareness, provide them with the correct vocabulary to help them begin forming their letters appropriately,  and allow for fun and sensory exploration, all while building self-confidence!


No Tears! Pre-writing is FUN!

Saturday, February 28, 2015

Pre-writing is FUN! Week #4

Hi Everyone, and welcome back after a much needed February vacation!

Wooden Pieces


This week in the Apple Room, Pre-writing is FUN! continued working on a lot of vocabulary around the wooden pieces used to make letters and Mat Man™(see previous posts).  This includes: Big Line, Little Line, Big Curve, Little Curve. Ask your kids to tell you how to make the first letter in their name, and I guarantee you will hear this vocabulary! 


Backing it up a bit……Starting this morning, the kids were wiggly, talkative and were having a hard time listening. Granted, they are 4 and 5 years old, but what I have seen in regards to attention and motivation to learn has been amazing, and it was clear they simply needed to MOVE! It's been a long winter here in Vermont, and I think the frigidly cold weather has gotten to everyone - cabin fever! So, we stood up and did some marching, pretending we had weights on our feet, performed cross crawls, slow and with purpose, and then lined up for some wall push-ups, prior to reconvening in a circle on the carpet. Upon sitting back down after those simple movement activities (incorporating some cross brain activity and heavy work) I now had new class working with me! 


They were now ready for our pass the putty activity, which we have done since week one. This week I passed around green putty, which is more resistive than the tan passed around in previous weeks. All I had to do today was hand the putty to one of the students and he immediately started talking about going skiing on Saturday. He did this without any cues from us. Repetition and routine are so beneficial with the pre-school age and incorporating a sensory motor tool gives them a nice connection as well. Children learn through their senses, beginning in infancy, and this has been the basis of Pre-writing is FUN! in the Apple Room and is the base of Get Set for School® from Handwriting Without Tears®. Learning through play and sensory motor activities helps the learning "stick" and meets children at their developmental level.


While passing the green putty around and listening to their peers. I also handed out some other sensory tools. The kids loved squishing and squeezing tan putty while listening to their friends plans (they needed cues that the person with the green putty was the one talking about their weekend!) and also enjoyed trying out a weighted lap pad. It was really amazing how these 2 modalities calmed some nervousness, "fidgetiness" and talking out in a matter of minutes.


The kids were now ready for our songs. We sang Where do you Start Your Letters? to start, which I mentioned in Week #3 post. This song reminds the students that all letters start at the top, it teaches a top down approach and also helps to encourage some body awareness, as they learn about top, middle, and bottom. When you are done reading this post, get out a pen. Now, make 5 lines top to bottom and then 5 lines bottom to top, as fast as you can. Which were more efficient and neater? The top to bottom lines, right? Getting children in this habit young will provide benefits for years, even when carrying over to learning cursive writing. The Apple Kids already get it, you don't start at the bottom :)

Next, I introduced a new song; Tap, Tap, Tap! We focused on holding 2 big lines while following the directions to the song. During Tap, Tap, Tap, the kids consistently sing about the "big lines" they are holding while motor planning directions. They need to have body awareness when touching big lines to their toes and their nose, muscle control and proprioceptive awareness tapping loudly and then softly, and good auditory processing to follow directions. They were amazing!!

I then held up each of the 4 various wooden pieces singing and then having the kids repeat. There's that repetition again!
Michelle: "I'm holding a big line" …..little line, big curve, little curve
Apple Kids: "I'm holding a big line"
Michelle: "In my hands"
Apple Kids: "In my hands"

Lastly, we went around the circle and each child told me exactly how to make the first letters in their name using the Handwriting Without Tears® vocabulary. They visualized the letter in their mind and then explained where to start (the top ;) followed by what wooden pieces to use, phenomenal! I can't wait for Week #5! Please don't hesitate to contact me if you are thinking about ordering any materials for home.


Click here to order the cd from Handwriting Without Tears® 


Friday, February 13, 2015

Pre-writing is FUN! Week #3

This week I got back in Henry's classroom, The Apple Room and had a great time. The more that I get to know these kids, the more I am finding out how unique each one is as an individual but how well they all work and have so much fun together as a class as well! They really are just a great bunch! 

Beginning our time this morning,  we sat in a circle and passed the putty again! Each child took a turn squeezing, pinching, and passing the putty. As mentioned in Week #1 blogpost,  Theraputty is a great tool to use for strengthening the hand and finger muscles, especially prior to coloring, writing, drawing. It can also be used as a calming modality for children who fidget with their hands often. It holds more resistance than play-doh providing children with more proprioceptive input and feedback. The children told me about their weekend plans, and it seems a lot may be headed to the mountain for some skiing and riding! Next, we sang a song from HWT® called Where Do You Start Your Letters? This song helps to teach children at a young age to use a top to bottom approach when writing uppercase letters. Starting at the top, and getting in the habit young, makes writing easier and more fluid for children.

After we took turns around the circle, I introduced the children to all of the stations that were set-up around the classroom. This weeks main focus was using sensory motor ways to build letters, and I had each child initiate with practicing the correct formation of the first letter in their name. Once they mastered that letter they could move and make other letters or make pictures. Please enjoy seeing the kids working below, and excuse the quality of some of the pictures! 

Station 1 - Mat Man™  
Please scroll down or click here to read week one's post of Pre-writing is FUN! to learn more about Mat Man™ .  

Station 2 - Building Letters with Wooden Pieces

The Handwriting Without Tears Program® uses wooden pieces to teach children how to make letters and about the vocabulary used (big line, little line, big curve, little curve). In week 1, the wooden pieces were introduced when building Mat Man™ , so many of the kids already knew the names of the pieces. The blue mat or Mat Man's™ body is used as a base  to help kids build their letters. I also taught children about the "starting corner" on the mat, which again, promotes beginning at the top! The kids did a great job at finding the correct wooden pieces and building their letters. The kids that have middle starting letters, such as A, J and S, adapted quickly as well and understood exactly where to begin building the first letter in their name. 

Station 3 - Writing Letters with Small Chalk Pieces
 After building their letters and increasing spatial awareness, the children next drew the first letter in their name. The pieces of chalk were purposely broken to encourage the children to utilize a more mature tripod grasp. Using chalk on paper incorporates a tactile component into the activity as well.  For the kids that needed extra help understanding proper letter formation, I had them make rainbow letters tracing over and over their initially drawn figure, improving motor memory! HWT® also uses chalk and small slate chalk boards in their program. The chalkboard also helps kids understand not only a top to bottom formation but eliminates reversals. As you can see with the construction paper, if you begin at the left, in the starting corner, you are unable to draw a letter backwards (i.e. B, D, b, d). Parents, if you do end up ordering some materials from HWT®, I encourage you to also buy the workbooks and teachers guide to use the vocabulary we have been using in the classroom. If your children are going to Flood Brook School next, they will continue with this vocabulary and program in Kindergarten.

Station 4 - Zoo Sticks
Zoo sticks are an awesome tool to help increase intrinsic hand strength and improve fine motor coordination. I've talked about them in my What's in My Kids Easter Baskets? posts. The kids were taught to use their "pinchers" instead of all 5 fingers or a fist, and every single one of them held the zoosticks properly! When kids hold the zoo sticks with their "pinchers" they are facilitating a pencil grasp. When they hold them improperly, they are not working to build the appropriate finger and hand muscles and quality over quantity is what is important here! There are a million activities that you can do with zoo sticks and they also work as a great clean up tool; think small legos!

Station 5 - Wikki Stix


I have to say that I think this may have been the favored station amongst all of the children! I know Henry came home and said this was his favorite and the kids were also asking to bring them home and make sure that I left some in the classroom for future use! Parents, you may be visiting Amazon and ordering a pack soon! The link takes you to the search page for Wikki Stix, so you can order as little or as many as you like! This station was a favorite with Mrs. Adams I think too, she was so excited to watch the kids independently build out their entire name when all we instructed them to do was build the first letter and then be creative from there! These kids rock!

Station 6 - Rice & Beans (Lentils & Chic Peas too!)
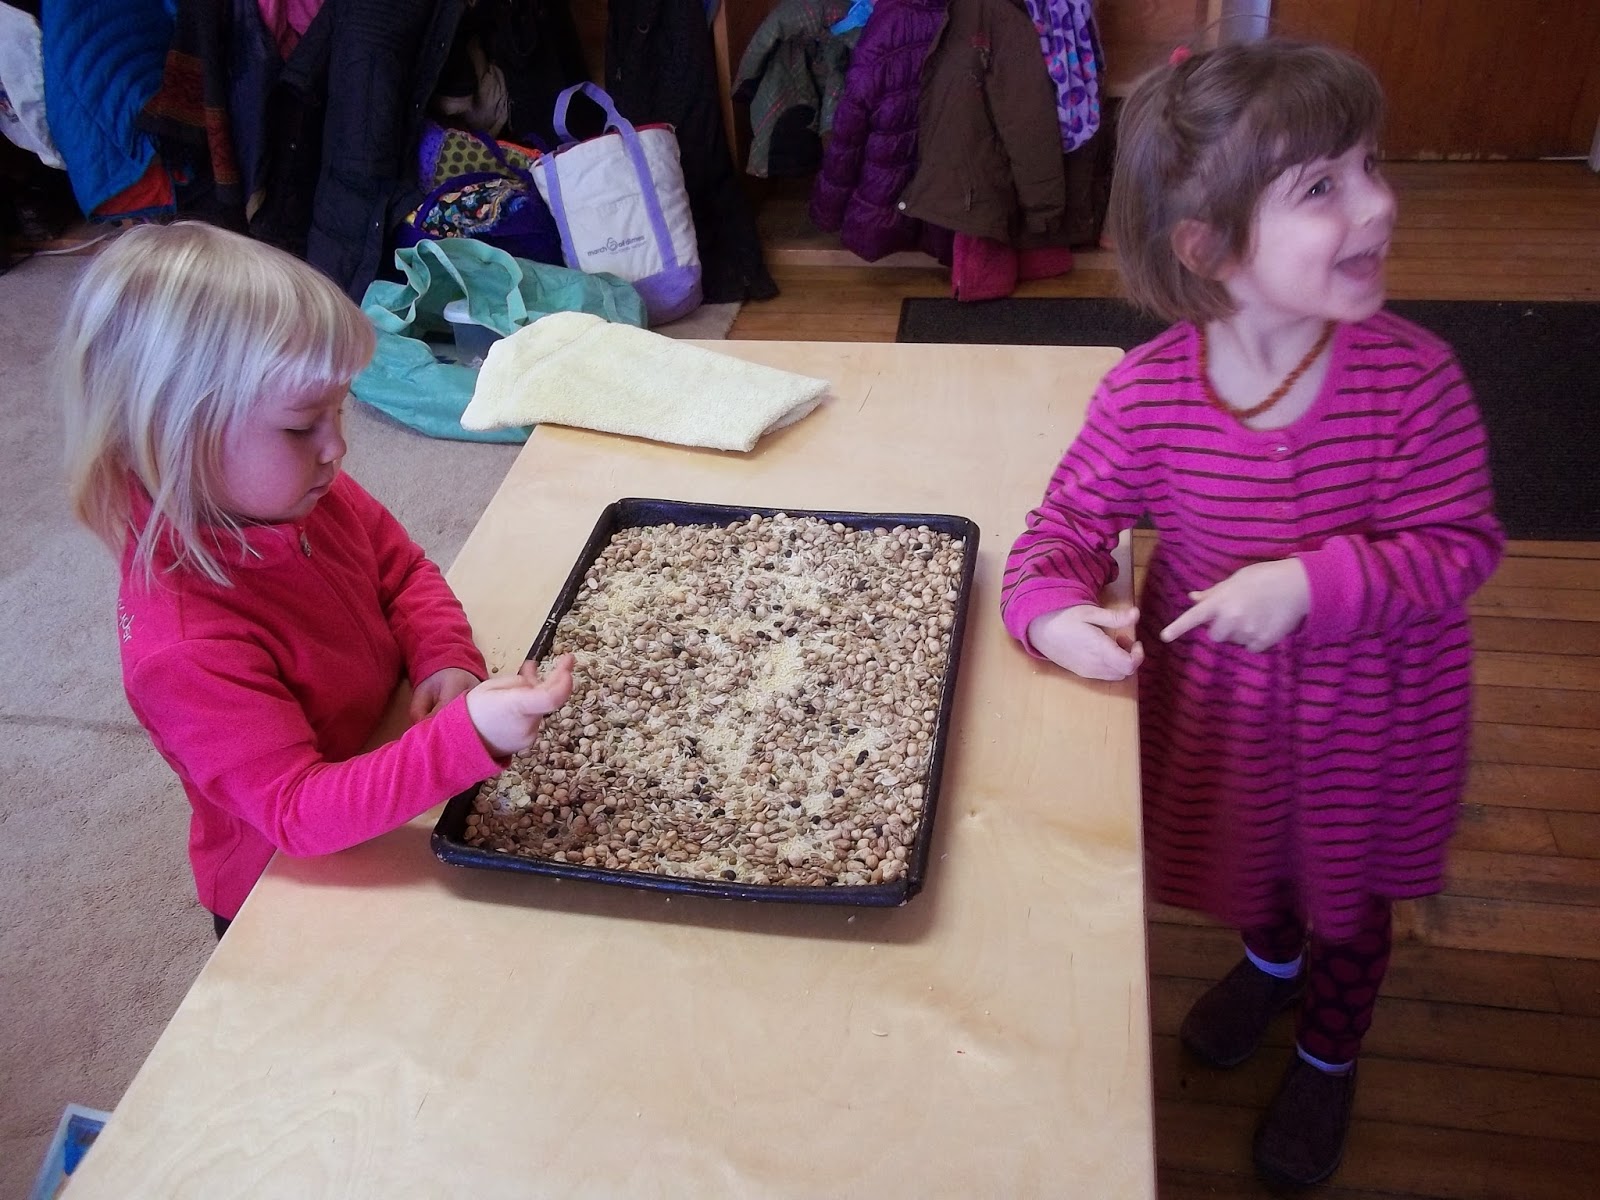
The last station was a tray of rice and beans where the kids were encouraged to use their isolated pointer finger to draw the first letter in their name. We encouraged the students to start at the top, wherever that was for where they were standing, and for many, this had already become habit after only an hour of practicing! 

Multisensory experiences are wonderful to do with your pre-schoolers before getting to the pencil and paper, as developmentally some may not be 100% ready! Incorporating the senses increases the likelihood that kids will learn and retain information as well. It allows children to learn in different ways and neurologically, it allows the brain more opportunities to  store and integrate this information and retrieve it when moving to pencil and paper is appropriate and more consistent.

Looking forward to Pre-writing is FUN! Week #4 on February 27th. Hopefully, this gives everyone some fun, multisensory activities to do with your kids over President's Week!  

Friday, February 6, 2015

Pre-writing is FUN! Week #2

Hi Everyone, and welcome back to week #2 of Pre-writing is FUN!
Unfortunately, we had to postpone this week in my son's classroom due to Henry being sick. However, I will share some fun, indoor activities that you can do this weekend.

The first is a baking activity. As I have mentioned in previous posts, baking is a great way to incorporate the kids in a life-skill activity, teach them about numbers, measuring, sequencing, following directions and enhance fine motor skills all while targeting the tactile system. This morning we made one of our favorite muffins - GF Banana Chocolate Chip Muffins from one of my favorite recipe websites. After you make these muffins this weekend, I encourage you to look around Tapp's website. She has amazing information about nutrition, health, gluten, and not to mention, fabulous healthy recipes! The kids had fun stirring and getting messy, and once they were bored with our planned recipe, they decided to set-up their own baking game raiding my spice drawer. It came with a mess, which I have to admit I need to be ready for, and this morning I was okay with the disaster! Lukey even got his computer out to "look up" a special recipe of his own! A quick side note - I don't think that everyone needs to be gluten free. I am because it helps keep my Lymes Disease under better control and Henry has a significant sensitivity to wheat (increased behaviors, emotional dysregulation and bedwetting - non of which he exhibits when I am very strict with his diet). However, even without these challenges, I limit the amount of gluten (and dairy) that Lukey and Livvy eat as well. There really is no need to load kids up on wheat and gluten and even dairy the moment they start eating. Read an article here, written by our families ND about how to give your kids a nutrition rich diet. Have fun with the kids stirring, mixing and kneading! After you have your hands warmed up, work on some coloring, drawing (Mat Man™) and name writing practice!


The next activity that we are going to do at home this morning is make a calming Chamomile Play Dough. Kneading, rolling, pinching and squeezing dough works as a self-regulating activity, especially with the aromatherapy of chamomile. It also increases fine motor strength and coordination. Improve pretend play skills making fun designs out of the dough. Also tie in some pre-academics by building letters or numbers out of the dough. Kids under 5 are not always developmentally ready for pencil and paper, so using dough as a sensory motor way to teach letter formation is great! Next week, I will get into more specifics about sensory motor letter building when I am back in The Apple Room at The Little School. I also encourage you to take a look around The Imagination Tree's website when you look up the Play Dough recipe and subscribe to her mailing list for wonderful, playful ideas!

Have fun, stay warm and enjoy!! Looking forward to week 2 in the Apple Room next Friday! 

Friday, January 30, 2015

Pre-Writing is FUN!

Welcome Little School Families, and thank you for visiting my blog page! Anyone else visiting, I hope you enjoy the next 6-8 weeks of posts, as they will be educating everyone on how to engage pre-k kids in learning about writing and more.

Today, I had the amazing opportunity to work in my son's pre-school classroom at The Little School. As a family, we truly feel blessed to have such a wonderful pre-school with caring, loving and compassionate teachers! When your children attend The Little School, we, as parents, are required to provide parents as partners hours each year. This can mean anything from volunteering at fundraisers, doing classroom laundry, disinfecting, and so on. This year, I am lucky enough to work in the Apple Room and share time with Henry's class teaching them pre-writing skills using many activities from The Handwriting Without Tears® Get Set For School® Program. The purpose of each blogpost is to encourage families to continue the learning at home and engage in these fun, meaningful activities with your children. I have been using this program since 2004 with wonderful success from children as young as 3 up through 6th grade, and I am excited to share what I know with you!

This morning began with the Apple children sitting in a circle and taking turns with glitter putty. While squeezing, pulling and squishing the putty, each child talked about their plans for the weekend before passing the putty to their peer. Theraputty is a great tool to use for strengthening the hand and finger muscles, especially prior to coloring, writing, drawing. It can also be used as a calming modality for children who fidget with their hands often. It holds more resistance than play-doh providing children with more proprioceptive input and feedback. After this little hand warm-up, the students drew Mat Man™on a piece of paper. They had already been introduced to Mat Man™by their teachers, so this little drawing activity was fun!

Next, the children were introduced to building Mat Man™! Mat Man™ was developed by Jan Olsen as part of Handwriting Without Tears®. When building Mat Man™, children learn about body awareness, language, social skills and turn taking to name a few. Initially, I built man man while the children helped to sing the Mat Man™Song (listen to a preview of the song here). Next, I handed out all of the pieces required to build Mat Man™, and the children built him themselves. They took turns and worked so well together it was awesome to watch! Once he was built, we engaged in fine motor "warm ups" (briskly rubbing hands together; squeezing fingers into a fist and opening them wide spreading fingers apart; squeezing on tight, pretend gloves; pushing hands on floor). These types of movements help to wake up the fingers and hands and get them ready for drawing! We also performed cross crawls before sitting to draw our 2nd take on Mat Man™. Cross crawls encourage cross brain activity, which stimulates the brain and prepares it for learning, while also improving body awareness. To perform a cross crawl, you bring right hand/elbow to touch raised left knee and left hand/elbow to touch raised right knee alternating in a smooth, fluid pattern - you can find videos demonstrating the cross crawl on youtube. The kids had fun trying all of these movements and did a wonderful job even though some were challenging!

To end this mornings session, the kids each drew Mat Man™ for a second time. Some of their drawings were more detailed than the first after only a short 20 minutes of building him and engaging in some movement described above, which was fun to see! Lastly, each child had their hands traced on construction paper. I cut out each child's hands and the teachers are going to laminate them. This will allow the children to build Mat Man™in the classroom using their own hands, which always seems to make it more meaningful and special! Please click here for instructions and templates on how you can build Mat Man™at home, which I highly encourage! I also didn't mention that the wood pieces that are used to build our friend have specific names, which are discussed on the websites link. The important part of this is that you can also use these wood pieces to build letters, and it teaches and encourages children to begin using language that they will need when learning to form their letters.

Fun tips
*It's never to early to start reading and educating your children on moving from left to right on paper
*When they are learning to write their name, teach them proper letter formation (start with a top to bottom approach as a beginning)
*Please encourage an appropriate tripod grasp for your children by the time they are in the Apple Room (last room before Kindergarten) - Bad habits are hard to break!

Thanks for visiting and please don't hesitate to contact me with any questions. I am already looking forward to week 2 with The Apple kids!

Sunday, March 16, 2014

Homemade Binoculars & Bear Hunt // Fine Motor, Visual Motor, Bilateral & Play Skills

This morning, my boys were obsessed with going on a bear hunt around the house. I'm not sure why, but bears have been a hot topic around the house this winter! So, to make this activity more interesting, we decided that we needed binoculars before going on our hunt. I rounded up some toilet paper and paper towel rolls out of the recycling bin (happy environment :), and our activity began! I did the cutting of the paper towel roll for this one, but if your kids are older than mine, I would let them cut the paper towel roll in half with adult scissors (works on fine motor, visual motor & bilateral skills). The rolls are a nice resistance to help increase hand strength as well. Next, and the rest of the steps the boys did mostly on their own (they are almost 4 and almost 2), we glued 2 rolls together and let them dry (fine motor skills/strengthening & bilateral skills). I also had the boys blow on the glue, incorporating oral motor skills, to help it dry faster, as patience is limited with my youngsters, but something we work on improving. 

**Now, this is a complete side note from the activity, but looking at the picture above, there is a lot going on, to say the least. When I took the photo, I honestly didn't pay enough attention to the snowsuit drying on the chair in the background, the empty fruit bowl, and the different placemats on the table. Although you can get the gist of the activity from the photo above, a child with any visual challenges may have a hard time deciphering what this photo is showing, as it is visually overstimulating. They may get lost in the chaos of the picture, and making this point is exactly why I kept the picture on this blogpost. This is important to remember when working with kids, especially kids that are showing challenges related to visual perception or visual motor integration. A note teachers and parents, keep worksheets "easy on the eyes," and when setting up activities, have workspaces clean and organized. In other words, simply limit visual chaos when you can, allowing kids to be more successful and be able to focus better on the task at hand!** 


Once we were done blowing on the glue, we got our paint ready. The only colors that we had left in the house this morning were the primaries, which ended up working out great to teach Henry about mixing colors. Right now, his favorite color is purple so we took some blue and red, blended, and Voila, purple! To Lukey, everything is blue right now, so he just had fun painting!


After mixing, the painting followed. First, painting hands (tactile system targeted), then, painting the binoculars in the making. In the photo below, you can see Henry holding the rolls with one hand and painting with the other (bilateral skills), he is also working on his fine motor and pre-writing skills, along with incorporating visual motor integration deciding where to paint while remaining on the rolls. His proprioceptive system is also playing a role here, letting Henry know how much force to use during   the activity!


 Binoculars painted and drying. Again, working on patience, and teaching the boys that satisfaction is not always immediate. Developmentally, they don't have the capacity to comprehend waiting forever for things. However, I feel that children nowadays get immediate gratification with everything, mainly due to technology. Teaching them to wait from time to time, is a great life lesson starting young, and will help hopefully help my boys as they get older because gratification shouldn't be immediate, if it's worth it at all!
 Now that the binoculars were dry, it was time to poke holes in the side and make our holder. I used the sharp part of the scissors to poke a hole through simply because I didn't have a one hole punch available. If you do, allowing the kids to use the hold punch is great for working on fine motor skills, improving intrinsic hand strength along with bilateral skills. I let the boys string the string through the holes (fine motor, visual motor, bilateral skills) putting on the finishing touch, and then it was time to hunt (play skills).
Henry was a bear himself getting mad at me for the final photos, so this is the happiest face that I could get! But once we started playing and pretending, it was all smiles from that point on!


I hope that this helps give you an activity idea to do with your kiddos at home or with your clients in OT! Something so fun for the kids, is again, developmentally so beneficial on numerous accounts. It's also an activity that can be graded for different ages, I briefly discuss grading activities in a previous post Saturday Morning OT..In the Comfort of your own Home?!


Happy Hunting!

Sunday, February 2, 2014

SATURDAY MORNING OT....IN THE COMFORT OF YOUR OWN HOME?!

A few weeks ago, my girlfriends came over as the boys were playing with play-doh at the kitchen table and Livvy was in the ergo baby, the place where she is pretty much glued these days. Babywearing, however, is a whole other blogpost meant for another day! Back to the subject, my friend said to me, "do you do this stuff [play-doh] with them often?" My answer, "yes." Since that day, I have realized that as much as I usually leave my OT hat at the door and do not overanalyze my children, I do engage in many activities with my kids that I recommend to my clients to do with their children. We paint, fingerpaint, draw on the easel, play with play-doh and putty, play with zoo sticks and chopsticks, are always cooking, and incorporate multi-sensory experiences into a lot of our play both indoors and out. What I began to realize is that; maybe I do play with my kids a little differently. Is this because, somewhere in my brain, there is a little OT that is always making sure we are engaging the senses, enhancing fine motor skills, working on balance, or engaging in bilateral activities, to name a few. This winter has given us some weekend days that have been too cold to bear the outdoors, and with a newborn in the mix, play in the snow has been tricky. Creating games indoors that can entertain all day can sometimes be a challenge, but we have made it work with some of the activities listed below.

Gluten Free Spinach Brownies and Coconut Milk Whip Cream, YUM! 
I rely on tappstips.com for a lot, meaning 99% of my baking needs! It is an amazing website filled with awesome, healthy, gluten free recipes that my kids (and I) love! I have tried other websites, and I'm never as happy when I just follow Tapp. My son Henry is gluten free, which has pretty much changed our lifestyle as a family. This particular day we had my niece's birthday party on the agenda. That means that I have to be prepared and have a dessert on hand that Henry can enjoy too! Now, including kids in on the baking is not always easy, but it is such a great family activity, which also incorporates an array of skills for all ages! Before we get into the OT areas of focus, here are some tips when deciding to cook or bake with your kids.

1. Be prepared! Have everything, I mean everything, out that you are going to need. If you don't, I guarantee a mix up somewhere! In the picture to the left, I have all of our ingredients, measuring tools and bowls ready to go. I also pre-blended the cooked spinach and cacao powder to make things go smoothly. The boys are so excited to cook when I am ready that they are happy to play in the living room until I call them to have fun in the kitchen together! Being prepared can also go beyond one cooking activity. Prepping and having things ready for the week makes time in the kitchen more enjoyable during cranky hours and keeps the family eating healthy!

   2. Relax and be ready for a mess! My husband thinks that I am crazy     when I let the kids stir, mix, and in essence, sometimes destroy the kitchen! However, healthy eating is a huge part of our lives (not that I am saying brownies are but these aren't so bad ;), and I think that learning to be in the kitchen and enjoy cooking is a wonderful tool for my kids. If I am not including my kids in the actual food that I am cooking, they are often times at the counter or table mixing up old spices, flour, water, playing with a rice and bean bin, or making pretend food with play-doh. I know they are engaging their tactile senses while making a mess, and not to mention allowing me to cook so that we can eat at a decent time, so I don't mind the extra clean-up!

    3. Teach Safety. Let your kids know what the safe kitchen tools are for them to touch and what the dangerous ones are, tell them about oven safety and that they cannot get near an open oven. You will be surprised how much they can understand and will respect when told to them in a respectful, loving manner! The "freak out" when a child grabs a knife or comes to close to the stove does not benefit anyone, so pre-teach when your kids are going to be in the kitchen.
Happy Coconut Faces!

4. Have Fun! Just enjoy this time with your kiddos. Cooking from scratch is not easy and we spend A LOT of time in the kitchen in my house! There are plenty of times that I wish I was in there alone, but then I think, I will never ever have this time with my kids again, they are learning great life skills, lets all just enjoy it! Believe me, my house is usually insane between 5 and 6 pm and I am ready to pull my hair out, but when I remind myself to have fun with the kids and that everything will be clean and calm in a few hours, it does help, I promise!

What Are We Working On?
In speaking about cooking/baking, the benefits from an OT perspective are endless. This is also an activity that OT's use in pre-schools, hospitals, nursing homes, etc. showing it is an ageless task! It incorporates fine motor skills, fine motor strengthening (stirring, kneading, pinching) visual motor skills, bilateral skills, math skills, reading skills, it engages the senses (to name a few: tactile, visual, oral, proprioceptive; how much pressure to use, auditory; following directions or jamming to music in the background while cooking :), organization, motor planning, and life skills! You can grade the activity to the level of your children, meaning, they could be as involved as making the grocery list to just the pouring, mixing and licking of the tasty mixers!  The benefits truly are endless so families, get cookin'!

Docks, Boats and Sharks, oh my, 
All with the use of couch cushions
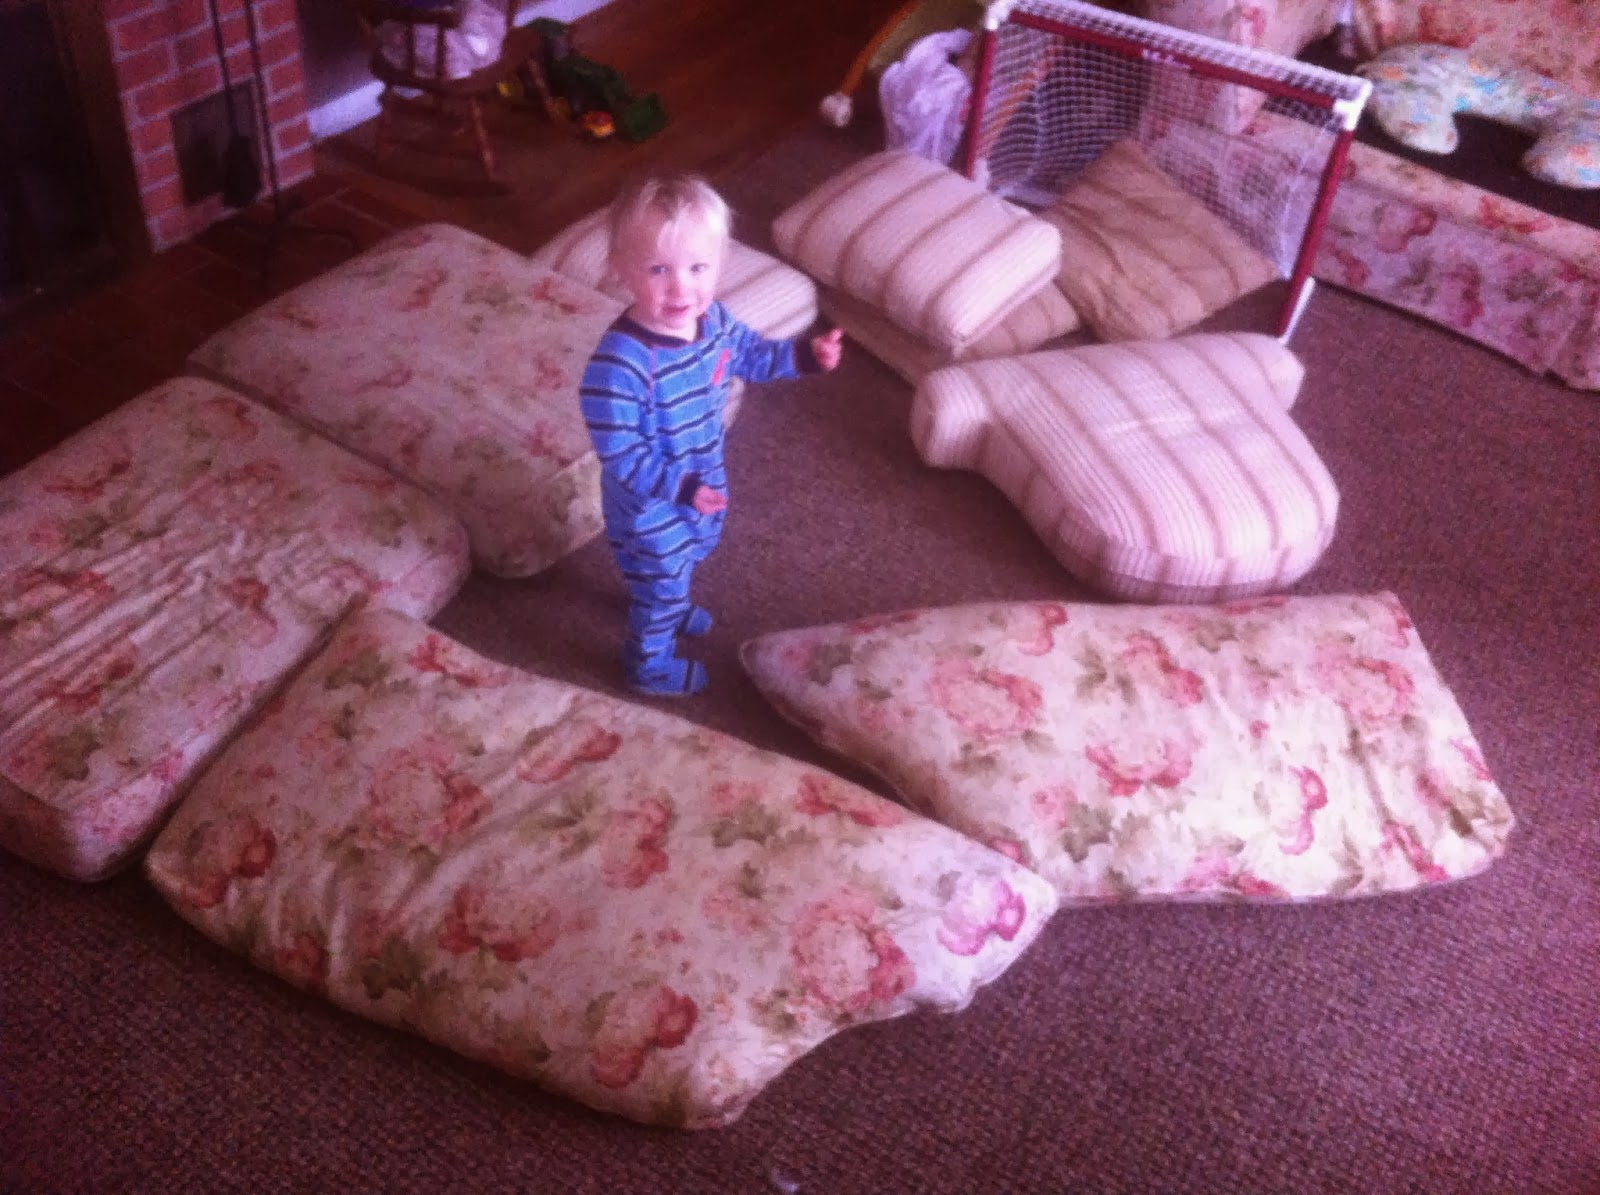
When I was an OT providing homecare in Manhattan apartments, creativity was a must! Making a small space into a therapeutic, sensory haven for an hour, couch cushions became a staple. On this cold, winter Saturday morning, while the brownies were in the oven, our living room became the ocean. The boys think that this is one of the greatest activities ever, little do they know they are working on essential developmental skills each time the couch cushions hit the floor!
On this particular day, the couch cushions were docks to get to the boats, which were now the empty couches and chairs. They were also sharks in the ocean, unsteady rocks and huge clumps of seaweed! This activity has also brought us to the moon, on a safari and the couch cushions have also just been on the floor as a landing pit for jumping or incorporated into an obstacle course. Let your imaginations fly and this can entertain for hours!

What are we working on?
In the photo directly above, Lukey, who is 20 months old, is challenging his balance by walking across the soft, unsteady couch cushions while also engaging his vestibular and proprioceptive systems. Looking at the middle photo, Henry is in the background dragging the cushions off of the couch and placing them on the floor. This is a great 'Heavy Work' activity that can organize and calm a child. The sky is the limit and pretend play is the cornerstone to our couch cushion game. Often times, children have a difficult time expanding on their play skills. Using a concrete item such as couch cushions and pretending they are sharks, for example, works to expand play and creativity. Adult facilitation may be needed to enhance these skills, but that depends on the age, level of pretend play and the goal. This game also works on gross motor skills (again, walking on the cushions and jumping from the cushionless couches, aka boats to the docks!). Turn taking is also involved and a great deal of social interaction is going on! All in all, our Saturday morning is not lacking in skill building while having a blast!

WOODEN BLOCK BUILDING 

Due to Lukey's age, Henry and I saved this activity for nap time. Henry is into building right now and Lukey is into demolition. This makes for some sibling battles, which on this day, I was not willing to referee! These old school blocks that I picked up at a yard sale are heavy duty and sturdy and can make virtually anything under the sun. Again, imagination and creativity can take you anywhere!

What are we working on?
Visual-motor skills are the focus of this activity allowing the hands and eyes to work together in a coordinated manner to construct a final product. We also work on naming shapes, that proprioceptive system again, and the tactile sense. Of course, pretend play leads and carries us through because without the motivation to continue, you really can't focus on other areas of development.


FINGER PAINTING ON THE EASEL

Working on a vertical surface is a great way to help kiddos strengthen their shoulder girdle, which in turn aids in fine motor development and intrinsic hand control. If you don't have an easel at home, simply tape a large piece of paper to a door or a wall you don't mind getting dirty. OT areas of focus include: fine motor skills, fine motor strengthening, intrinsic hand strengthening, finger isolation, visual motor skills, visual perceptual skills, bilateral skills. Working on an easel is also a tactile activity (finger painting, touching crayons, markers, textured paint brushes, chalk), it incorporates proprioceptive functioning, enhances ocular motor skills, works on colors, shapes, and turn taking. You can have your kids stand, sit in a chair or sit on a small therapy ball to include core work and trunk strengthening while playing at the easel. Finished products can be placed on the fridge, hung on a string in your children's rooms with decorated clothes pins, or framed for some wall art. Therefore, building self-confidence in your artists as they see their work displayed!

FLIP-FLOPS, BEACH BLANKETS AND SNOW FILLED POOL
Not being able to go outside as much this winter makes for 2 stir crazy outdoors kiddos! So, what to do? Bring outside in? Yup, and as with cooking, the mess can be cleaned up later! In the picture above, the boys put on their flip flops, got out their beach blankets and we pretended to bathe in the sun! I also let them play in a small tub of sand (this bin is usually filled with rice and beans for kitchen play), we had some extra left in the basement from an OT group that I did one summer. 
What are we working on?
Well, there is, of course, the pretend play again! Play is truly the way to engage kiddos in so many activities and even makes learning letters, numbers, pre-writing and writing fun, as children get older. This is actually where I came up with the name Pediatric Play! Kids always loved coming to OT, even when I made them work hard, because I tackled the challenges with play!
This activity also works on self-help skills (we just put on flip flops but you can also have your kiddos get on their swimsuits, put on lotion as pretend sunscreen [also a great deep pressure touch/calming activity], wear their life vests, etc), fine motor skills playing in the sand, and stereognosis (finding hidden objects in the sand and naming them by feel). You can also hide puzzle pieces in the sand and incorporate visual-motor skills into the activity or have your kids pull out the hidden objects with zoosticks or chopticks really focusing on fine motor skills and strengthening. Since we had the blankets out, we also did some yoga, engaging the whole body, especially the core, and working in a nice calming activity great before nap time.

Another fun way to entertain kids while stuck indoors (on this particular day, I'm pretty sure that the temperature never reached beyond -2 degrees, that's cold!), is to bring the snow in. The great part about snow is that it melts and needs a quick towel swipe to mop it off of the floor. I have to give credit to a teacher that I work with for this idea, she posted pictures of her kids playing with snow and food coloring indoors, and I was so grateful for the idea to entertain my own kids! Now, we also used food coloring to decorate the snow and small cups to make snow castles! An important note; the only reason that we have food coloring in our cabinets is for making play-doh and now, for decorating snow. Follow the link here http://articles.mercola.com/sites/articles/archive/2011/02/24/are-you-or-your-family-eating-toxic-food-dyes.aspx for a great article on the dangers of food dyes. I highly recommend you always read ingredients when buying food, and anything with food dyes, please return the item to the shelf. Your children do not need them in their developing systems. 
What are we working on?
There is a level of heavy work involved in this activity, as I allowed my older son to help me carry the pool and also shovel some of the snow into the pool. Again, we're engaging the tactile senses (touching the snow, feeling varying temperatures), self-help skills (donning and doffing mittens), a small amount of fine motor skills are involved (squeezing the snow, crushing the castles and finger isolation, drawing in the snow), bilateral skills, visual-motor skills (building castles, making various size castles with the stacking cups helping to understand small, medium, large), visual perceptual skills (guessing what Mom drew in the snow), and oral motor skills (chewing on the snow and awakening the mouth with a cold, cold temperature)! This honestly entertained the boys for 2 hours in the kitchen, and I felt good that we brought a piece a nature in for the day!

I hope that you have enjoyed reading about some of the activities that we like to engage in on weekends at home. Upping the ante or adding in variables can also make an activity fun or increase the amount of developmental skills you are focusing on, without even meaning to! If you think that your child is demonstrating challenges with any of the skills areas discussed, these activities are not meant to take the place of consulting with an occupational therapist. I think that it is important for families to know how much you can incorporare the sensory systems and enhance development with activities in the comfort of your own home!